Thursday 28 November 2013

Merry


Oh the games I had making this card!

I had an idea that I would cut a circular aperture in the front of a card. Then I was going to frame it using a scalloped die-cut. So I used the largest die from my set of Nesties to cut the aperture and then discovered that I couldn't cut a scalloped frame because the scallop circle Nesties aren't big enough, I ended up with lots of little pieces and not much else. What I should have done was cut a smaller circle in the first place but hey-ho.

I now had a card with a large circular aperture but it needed some sort of definition round the hole. I used Versamark ink to coat the actual die, lined it up carefully with the hole, and passed it through the Cuttlebug again, then quickly sprinkled with gold embossing powder.

If I'd known previously what I needed to do I would have inked the die before making the aperture, it would have done it in the one step instead of having to re-line it up etc and maybe given a neater finish.


All that done I cut the landscape piece using pearlescent white card and attached to the back of the aperture. This means I can write the greeting on the inner left side.

The card still needed something else. I decided to use some Frantage chunky white embossing enamel to mimic falling snow.
I sprinkled a small amount directly on to the card and heated from underneath (you don't need to use ink with this).


Lastly, stamped 'Merry' using a SU stamp and matching tag punch, and tied some gold elastic round the spine.

Monday 25 November 2013

Birthday Wishes


Another Lili of the Valley image
Dies are Spellbinders
Stamp by Waltzingmouse
I've added some pink tulle behind the die-cuts


Saturday 23 November 2013

Flowers


Image is by Lili Of The Valley  --  they do pads of thirty for £6, free p&p. Most of them are cute-style but I spotted this flower theme one too. They are printed on nice quality cardstock and the colours are bright and clear, only works out at 20p per image.

Sentiment is by Waltzingmouse
Dies are all Spellbinders
I coloured white self-adhesive gems with Copics
Papers are DCWV

Thursday 21 November 2013

Birthday


 Bored of making Christmas cards at the moment!
Image is Lili Of The Valley, paper is Papermania
Sentiment and punch are Stampin' Up!
Corner die is Sizzix


Monday 18 November 2013

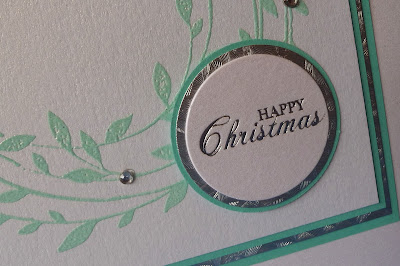
Wreath


Wreath stamp is by Hero Arts, I've used embossing powder.
Sentiment circles are by Craftwork Cards


Saturday 16 November 2013

Christmas


I haven't been posting much because most of the cards I have made recently have been very similar to what I've already shown.
Card above is the same as the last post except for different colour.


This one's 8" x 8", the central piece is recycled from an old card and I added the hand-written sentiment


These are Kaisercraft panels, again very similar to previous postings.
Next post I will have something different I promise.


Wednesday 13 November 2013

Vintage


'Photo' is by Marianne
Embossing folder is Papermania
Dies are Memory Box
Sentiment is Craftwork Cards


Sunday 10 November 2013

Christmas


Sticker is K&Co (extremely old)
Sentiment stamp is Woodware but annoyingly half of the words are incomplete on the bottom row and I didn't realise until after I'd stamped it so had to try and rectify with a fine pen.
Embossing folder is Cuttlebug


Sunday 3 November 2013

80


Made for a wonderful lady at my card club who loves purple and is celebrating a special birthday. She's taking it easy on the day itself by skipping off to New York for some shopping...hope I'm doing the same at that age!

I've used Nestabilities labels 22 to make the easel part. Basically you stagger the cutting plates on your Cuttlebug/ Big Shot so that only half the die actually cuts, then use the next size down and cut the complete die.
The '80' is really the only number that will work (apart from 88) for the 3D effect because you need to have die-cuts that are absolutely symmetrical. So if it wasn't 80 then I would have used butterflies or flowers or similar.

I cut three of each number and folded them in half (which is why they need to be symmetrical) then the first half of the first piece is glued to the first half of the second piece, the second half of the second piece is glued to the first half of the third piece. At this point I attached a length of 'invisible' cotton, and then glued the second half of the third piece to the second half of the first piece.
That all sounds a bit confusing but it's very simple to do, I promise.
The other end of the cotton was attached to the top of the easel and then a second die-cut (the gold frame) adhered to the card.


Border punch is Martha Stewart
Swirl die-cut is Riviera Corner by Memory Box
Sentiment is by Craftwork Cards

Friday 1 November 2013

40


Spotty panel is Theresa Collins
Paper is Tilda
I've edged the tag with a Krylon pen (went through a phase about six years ago where I Kryloned everything, then forgot all about the pens, but pleased to say they haven't dried up and still work!)

The '40' is Sizzix Block Party alpha, I cut six lots of each number from cardstock then layered them up, to make faux-chipboard. The top layer was glazed with Glossy Accents and whilst still wet was sprinkled with Glamour Dust.


(ribbon is straight in real life!)