Showing posts with label Box. Show all posts

Saturday, 12 June 2021

Box


I bulk-bought a box of Lindt chocolate bars (Amazon) recently to use as inexpensive gifts. I wanted something slimline that would fit through people's letterboxes if necessary.


I made two different style boxes, one holds three Lindt bars and the other holds four.


Monday, 20 April 2020

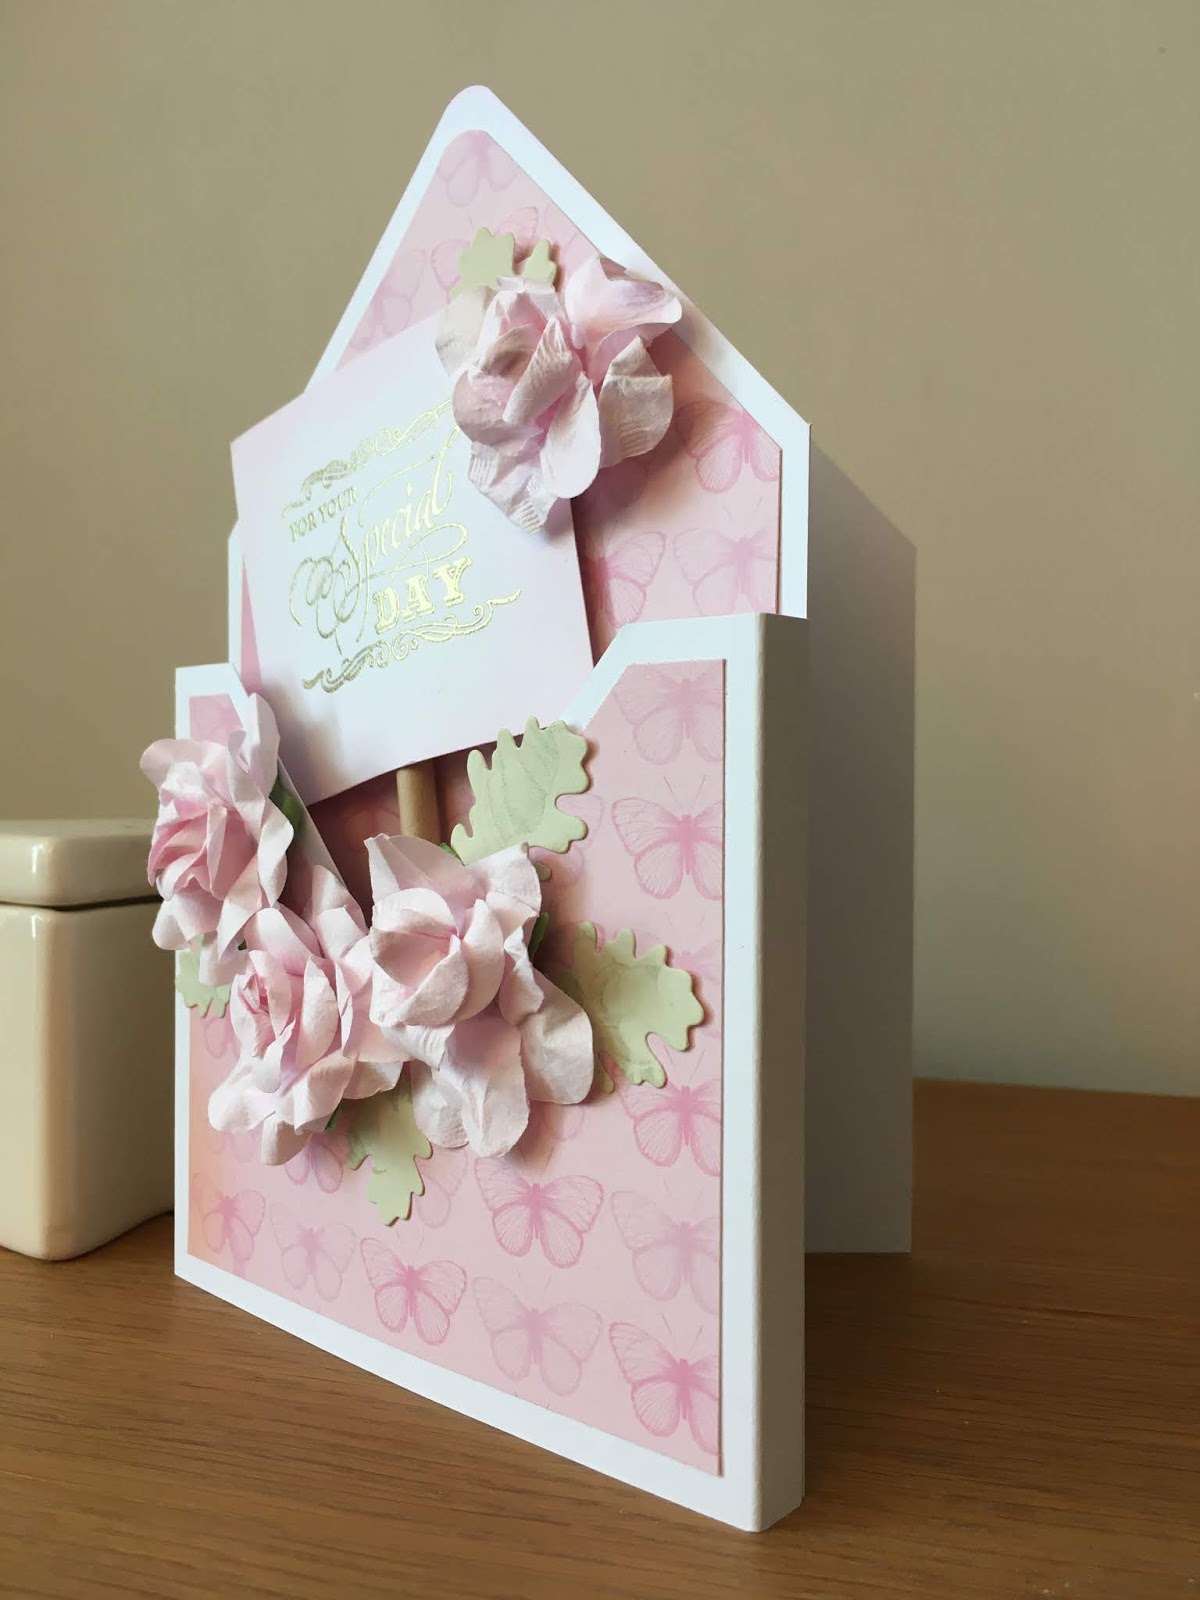
Envelope Card


I've seen a few of these style cards recently and wanted to have a go. I watched two different tutorials, one uses an envelope punch board, but this one doesn't.

It's also an 'open' style at the bottom which means that, if you didn't use 3-D flowers, then the card would fold down reasonably flat. Not flat enough for a normal postage stamp but you could fit it in a standard envelope instead of having to make a box.


The patterned paper is from my scrap box, flowers are cheapies from The Range.
I used a paper straw also from The Range to support the stamped sentiment, the stamp is by JustRite.


Tuesday, 18 February 2020

Oval Box


A bit of a fiddly project, using a set of oval dies from Card Making Magic

I was inspired by a project on Mixed Up Crafts, Sam had used the dies to make a tissue box.


Tuesday, 20 August 2019

Sweet


Stamps are by Docrafts. I've heat-embossed with white and gold powders.

Inside I made a simple open box, punching a 'bite' using an SU scalloped punch. The biscuits are (box of 48) from Costco but also available on Amazon, they work out less than 20p per pack so a fun addition to the card.


Monday, 1 July 2019

Card Box


This is meant to be a box to hold half a dozen or so cards. I made the box but haven't got round to making the cards yet...

Patterned paper is Graphic 45. The measurements for the box are from a great video tutorial on this blog by Teri Pocock.


Saturday, 30 September 2017

Boxes


Boxes I've made over the last few weeks to match cards. Each box holds four Ferrero Rocher chocs.
I was going to note the measurements here but the puppy + piece of paper left lying about = chaos.


Sunday, 27 September 2015

Box


A quick one in-between hospital appointments!
I find boxes are much speedier to make than cards.


20 cm x 20 cm card-stock and scored at 2cm all round.
For the lid I used the same measurements but didn't butt all the way to the left-side of my scoreboard, pulling away just a mm or two means the lid fits perfectly.

Deck the Halls die is by Tonic, stitched holly leaves by Poppystamps. I added some Glossy Accents to the berries.
The box fits one of these bars of chocolate, 250g, available in Lidl.


Sunday, 28 September 2014

Box


This is a variation on the box I made in this post.
I've altered the measurements because I needed a taller box. Dimensions are 23cm x 26.5cm, so unfortunately A4 isn't quite large enough, I had to break into the scrapbooking stash.

On the long edge I scored at 6, 12, 18, 24cm and then at 3cm up from the bottom.
The lid is a fraction over 14cm square and scored on each side at 4cm.


Tag is by Tilda, snowflake card is Kanban.

I usually buy small 'favour' gifts for people at Christmas; sweets, chocolates, miniature bubble baths, wax tarts etc. For people who I see regularly but who aren't on my proper list as such.
This year I've ordered personalised Coca-Cola bottles on-line, they fit perfectly in this box but you can also fit two in the Papemania gift bags I decorated recently.


Friday, 5 September 2014

Boxes


Having a clear-out I found a couple of old jewellery boxes, rather than throw them away I decided to cover the lids with some scraps of stash.


'With love' by Tattered Lace.
The leaf branch is part of SU bird punch.
Oval dies are Nesties, I've used two sizes but sponged ink through the top one so it gives a bit more definition.


Holly is an old Sizzix die, berries are by Papermania
Stamps are Waltzingmouse


Tuesday, 2 September 2014

More boxes


I've been using up some old Christmas stash making more boxes, the same size as previous post.


Then I scaled down the sizes to make a slimmer box.


Tip: do not use twine instead of ribbon, your box will not want to stand up straight ;)


I made this box to fit two chocolate bars. Guess where the second bar is?


Saturday, 30 August 2014

Tall box


A kind lady at my craft club has been baking birthday cakes for the other members recently.
I wanted to make her a small gift to say 'thank you'.

I know there are a million box-making tutorials out there but I like to make a box for a specific item rather than make a random box and then have to search high and low for something to fit in it.
I use Stampin' Up! grid paper to size out my boxes, the squares make it easier to see how many centimetres I need to measure out.


I cut a piece of card-stock down to 26 x 20cm then scored it at 6, 12, 18, and 24cm.
On the long side I scored at 3cm. I then cut away the small corner and decorated with some panels of SU patterned paper before assembling the box, the base just needs taping too (not shown on the photos but I'm sure you can figure it out).

Red ultra-sticky tape is on offer this weekend at Affixit Craft, it's a bargain price anyway but until midnight on Sunday everything is Buy-One-Get-One-Free. That works out at 40 rolls for £12.98, less than 33p per roll. Their 'Super Sticky Kit' is also really good value.


To make the lid I cut a piece of card-stock to 14cm square and scored it at 4cm all round.

 If I am making a lid I don't butt the card-stock all the way into the left-side of my scoring board, I pull it away about 1 or 2mm, if you don't do this you'd need to cut the card just slightly larger than 14cm.

I made a small hole in the centre of the card-stock before sticking the lid together.


I bought these biscuit sticks in Tesco, another BOGOF, they fit perfectly in the finished box which is about 17cm by 6cm.


Hopefully you can see why I made the hole in the centre of the lid. I wanted the lid to be held tight to the box so instead of tying ribbon over it I wrapped the ribbon up two sides of the box and then brought the ends up through the inside of the lid, before tying in a bow.


It is much more secure than if I'd just tied the ribbon round the outside, there's no way it's coming off!
This will work with any size box/ lid and if you've got plenty of ribbon you can bring it up all four sides and tie in double bows.


I finished the box off with a die-cut from a Clearly Besotted die, I think these are really good value at £2.50 each, cute font, I just trimmed the edges slightly to fit.

Saturday, 6 October 2012

Box


Grrrrr, so I figured out the measurements for a box to hold a 230g bar of Dairy Milk....and Cadbury's have changed the size to 200g.
I'm sure it won't make any difference to the box dimensions but annoying that they think customers won't notice there is less chocolate!


So I made a smaller box to hold a different manufacturer's chocolate bar.


The box is made the same way as the one I showed the other day, just change the measurements slightly and it will hold 'ChokaBlok' 100g bars instead of Dairy Milk. The Dairy Milk boxes are made with a single piece of 12 x 12 whereas this one uses a piece of A4.


I find it easier to buy something (chocolate!) and then build a box to fit rather than make a box and have to search for something to go in it.
I use a Martha Stewart scoreboard if I want imperial measurements and a Stampin' Up board on the top of that if I want metric. So for bars of chocolate I lay them on some scrap paper, on top of the scoring board, and roughly score around the bar, from there I can work out approximately what the actual measurements are.


 For 'ChockaBlok' 100g box:  

Take a piece of A4 card-stock, stamp a pattern randomly if wished.
Score at 2cm and 4cm along each side as shown above
Spin the card-stock round so it is landscape and score at 7cm, 9cm, 20cm and 22cm

Cut away each corner and fold all score-lines inwards.


Add a line of glue or ultra-sticky tape as shown in red above.
Assemble box and tie closed with ribbon and tag.


Monday, 24 September 2012

Chocolate Box


 When it's someone's birthday at my card-making club we like to give them a small inexpensive gift.
Cadbury's Dairy Milk is currently on offer at Tesco so I stocked up on a few bars thinking they would be ideal for the card-making ladies. I just needed to design a box to make them look a bit more exciting.


I decided on this wallet-style box, made from a sheet of plain 12 x 12
I've since made some with patterned card-stock and also tried stamping my own patterns on plain. It's a good way of using up patterned card-stock that I have been hoarding and don't know quite what to do with.


Score the sheet at 1 1/4" and 2" from the left and right hand sides, then score at 3" and 3 3/4" from the top and bottom.
Cut off all four corners where the lines intersect, that should give you something like shown above. Fold all the score lines inwards.


Put a couple of strips of super-sticky tape just on the bottom flap. If you want the top flap to have a fancy/ punched edge then do that now.


Adhere the bottom flap to the sides. This should now be a basic wallet-box.
It's just the right size for a 230g bar of Dairy Milk.


My craft club ladies have suggested punching holes in the top and threading ribbon through to make it look like a handbag. I just used some ribbon wrapped around and tied in a bow then added a matching tag.

Another suggestion was instead of using it for a bar of chocolate to put a bulky card inside, something like decoupage, that wouldn't fit in an ordinary envelope. I like the excuse of buying bars of choccy though...